Easy Recipe of the Week: Roasted Tomatoes 

  To all my readers and friends, I’ve been wanting to tell you all the ways I’m in a different place than I was two weeks ago.  Two weeks ago to this day, Nick and I packed our endless amount of stuff into the truck (down two flights of stairs no less), raced to South Boston, then emptied the entire truck into our new house! 

Since then, the house is laid out the way it should. In two weeks, we got a lawnmower, tv stand and a 9′ x 12′ rug for the living room (all hardwood floors). I enjoyed laying low for a week, reading this great book my sister gave me for my birthday (The Girls), but alas, a girl needs a job. I walked into Bistro 1888 looking to be a food runner, but they were so over the moon about my bakery experience, Chef Margaret has decided to ‘show me how to make everything on the menu.’ In short, it’s prep work, making dressings, sauces and marinades, and eventually, desserts. 😍 One of my tasks included peeling and chopping roasted tomatoes, and it looked so tasty I decided to make them at home! 

This is easy easy, and the possibilities for them are endless. Eat it on toast as bruschetta or mix it into risotto, like me!

Roasted Tomatoes

Roma Tomatoes
Olive oil
S & P/other spices as desired

Start by chopping your tomatoes in half lengthwise. Cut a ‘V’ in the top of both halves to core the tomatoes.   
Place tomato halves cut side up on an oiled rimmed baking sheet. Drizzle with olive oil and spices. I added dried thyme, and dried basil or oregano would work as well.

Bake at 400* for 30-40 minutes, depending on how much you have. I did 5 total, 4 homegrown (smaller), and unfortunately my new oven burns much hotter than its reporting to me. I put them in at 375* for 35 minutes and didn’t think much until my husband walked past and asked what was burning. No worries, the tomato skins got black but that’s exactly what you want!
 
Let cool completely, then remove skins  (should be very easy) and chop. Cook it into tomato sauce, fold into dinner dishes, eat alone on toast with olive oil and basil. Yum yum!

Love,
Feisty

Easy Recipe of the Week: Fish Tacos!

 
Fish tacos. Are. AWESOME! The flakiness of the fish combined with creamy avocado, crunchy cabbage and the irresistible sourness of fresh lime juice is one of my favorite things. And when my husband and I planned on spending the day at Kings Dominion, I knew I needed a simple dinner that was as delicious as it was easy.

Fish Tacos 
Serves 2

2-3 white fish filets
2 limes
2 avocados
Mayonnaise 
1 small head red cabbage
Various seasonings
Corn tortillas

Here’s how I did it: the day before, chop up half a head of red cabbage (green would work too but it’s not as fun!). Mix mayonnaise (enough to reach a dressing consistency) and juice of one lime in a bowl before adding cabbage. Cover and store in fridge.

When you’re ready for dinner, rinse your fish filets (tilapia, catfish, even frozen & thawed–any white fish will do), and season them with a bunch of seasonings! I added garlic powder, red pepper, cumin, ginger, oregano, salt and pepper, basically whatever I have on my spice rack.
Heat pan on medium high heat, add olive oil and/or butter and sauté fish for 3 minutes on each side.

Meanwhile, wrap corn tortillas (I do 3 per person, 6 total) together in tinfoil and place in oven. Preheat oven to 300 degrees to warm them up. Grab 2 avocados, cut them open and scoop them out. Slice each one into thin pieces and place on a plate; squeeze with half a lime.

And that’s your dinner! Cut the last half a lime into 2 wedges and put one on each plate. Perfect for hungry and sore roller coaster riders! 🙂

  Nick and I at Kings Dominion 💏

Bake at a Moment’s Notice

20140818-182653.jpg
It all started with the egg yolks.
A few days ago, I was commissioned to make a pan of s’mores fudge bars by a lovely co-worker of mine (my first sale!), and the recipe uses egg whites to make the marshmallow topping. I absolutely hate wasting ingredients, and I wondered what I could do with the 2 egg yolks left over. A cake, perhaps?
So I went to work looking for a recipe. Apparently, I’m not alone in not wanting to waste ingredients. Cakes weren’t a prevalent choice of recipe, but here was mini eclairs for two! Was this something I really wanted to take on? I scanned the recipe and, what do you know? I just happened to have the exact amount of heavy cream it called for, another ingredient I was trying to find a use for! From then on, it was pretty much kismet. 😉
20140818-181648.jpg
Mini Eclairs
makes 6
For the pastry cream:
3/4 c. heavy cream
1/4 c. sugar
2 T. flour
pinch of salt
2 large egg yolks
1/2 tsp. vanilla

For the eclair:
1/3 c. water
3 T. unsalted butter at room temp
1/3 c. flour
1/2 tsp. sugar
1/8 tsp. salt
1 large egg, beaten

For the glaze:
1/2 c. chocolate chips or chunks
1 tsp. vegetable shortening

First make the pastry cream. In a small pot, heat the cream until the tiniest bubbles appear at the edge. Do not boil.
Meanwhile, whisk together flour, sugar and salt. Add egg yolks and whisk together. The mixture will be crumbly. Very slowly pour the warm cream into the yolk mixture while continuing to whisk. This process is called tempering the eggs, and you pour it slowly so that the yolks don’t cook while their temperature rises to that of the cream’s.
Pour the entire mixture back into the pot over medium heat. Whisk constantly while it starts to simmer. Once it noticeably thickens (bubbles will have a hard time getting to the surface), continue to cook and whisk a few more seconds. Remove from heat and stir in vanilla. I whisked it in, which ruined the beautiful texture…but I’ll get to that in a sec. Scrape into a bowl and press plastic wrap directly to the surface of the cream. Chill in fridge for at least 3 hours.
After I added the vanilla, the mixture started to come apart. When I was pressing the plastic wrap to the top, a butter-like liquid was soaking through and I freaked out. I combed the web for tips on what to do; most people said to just wait the three hours to see if it thickens. So I did. And it worked! So don’t freak out if your cream separates.
Now, the eclair dough! In a small pot, stir together butter and water over low heat until butter melts without boiling water. Remove from heat and add flour, sugar and salt all at once. Stir until combined. Put pot back on burner (over low heat for gas stovetop, heat off for glass) and stir until dough pulls away from sides of pot, about 1 minute. Scrape dough into a bowl and mix on low until it’s only warm. Or let it sit out until warm…that’s what I did! Add egg and beat until dough turns pale yellow, about 2-3 min. Lay some parchment paper, or a silicone baking mat!, onto a cookie sheet. Put in piping bag and pipe 6 mounds, about 2 inches lengthwise with a 1-in opening on the bag. Alternately, you could use a spoon, but the piping bag is much easier and makes the mounds prettier!
Bake at 400* for 10 minutes, then open the oven door for 5 seconds and change the temperature to 350*. Bake another 18-20 minutes. When done, turn oven off and remove pan. Use a thin knife to poke a hole in the side of the eclair to release steam. Return to oven and let cool for 30 minutes with the oven door ajar. (I used a strategically placed wooden spoon.)
Next, slice eclairs in half horizontally. Fill with chilled pastry cream. For the chocolate, place chocolate chips and vegetable shortening in a small bowl. Microwave in 10 second intervals until melted, or set up a double boiler using a metal bowl and a small pot of water. Carefully dip tops of eclairs into chocolate. Chill until set for 15 minutes. Voila! A lot of words, an easy recipe and 6 delicious mini eclairs you just made yourself.

Love,
Feisty

Original Source

The Poor Girl’s Guide to Shrimp

I love shrimp. The whole world knows I love shrimp, and there’s even a famous fight in my family history about shrimp (me vs. my mom). Unfortunately, it isn’t the cheapest ingredient to work with. If you buy raw, shells on shrimp you can reduce the cost. I bought a bag of frozen raw shrimp with the top and bottom shells on for $17 at Kroger (cheapo grocery store in Richmond/southern Va), and was able to make 3 meals out of it, for 2 people each time. 6 meals overall, making the cost less than $3 a meal. Pretty good right? And then I found this recipe, which uses by products of the recipe as ingredients (meaning you don’t have to buy them!). This recipe is super cheap to make (minus that initial cost of shrimp) and more importantly, it’s delicious. It will make you feel like a seasoned chef too. 🙂
20131203-135341.jpg
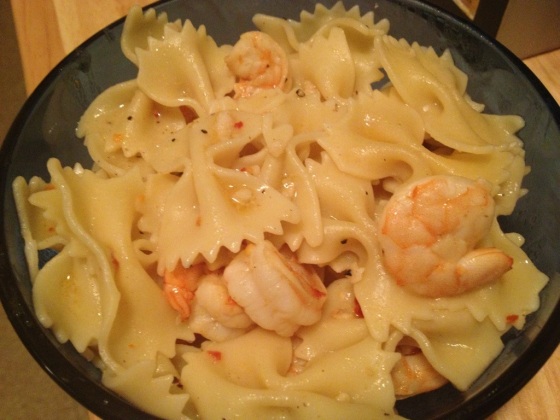
Shrimp Pasta

6 garlic cloves, pressed or grated
2 lemons
5 T. olive oil
1 tsp. red pepper flakes
21-25 shrimp, deveined & butterflied
1/4 onion
3/4 lb pasta (I used bowtie)
2 T. butter (I cut this in half, using 1 T.)
salt & pepper

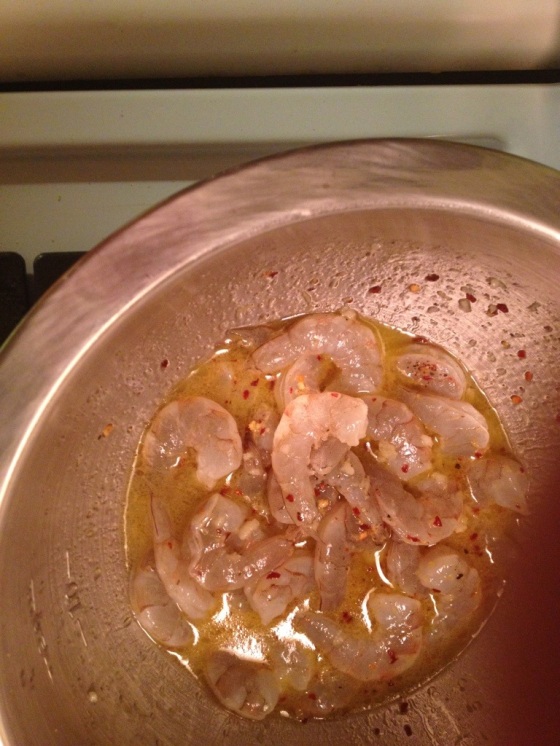
In a bowl, combine garlic, zest and juice of one lemon, olive oil, red pepper flakes and salt and pepper. Remove shells from shrimp and save, and add shrimp to bowl. Set aside to marinate.
20131203-134051.jpg
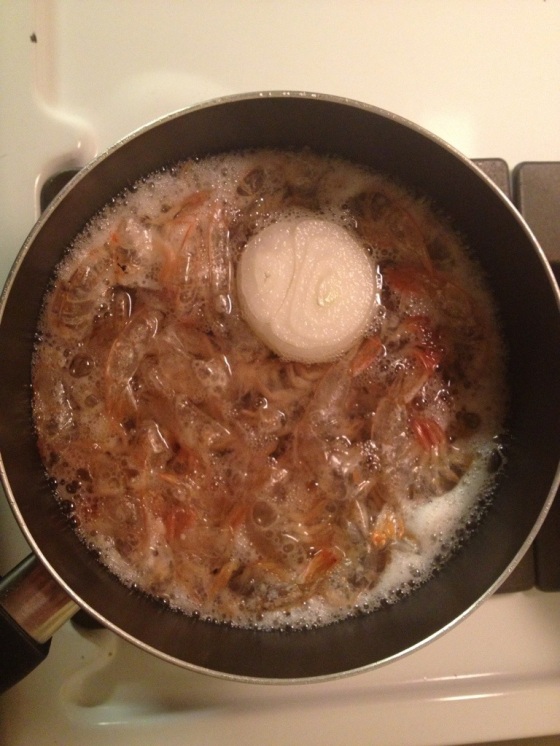
In small pot, add shrimp shells and onion; cover with water and bring to a boil. Reduce heat and simmer for 20 minutes. You’ve just made a shrimp stock. 😉
20131203-134156.jpg
Strain into a bowl and discard shells and onion. Bring a large pot to a boil and add pasta, cooking as directed. The original recipe called for linguine, I used bowtie; you can use whatever your heart desires. Also, for 2 people I’m not sure if I used 3/4 lb, just use what you need.
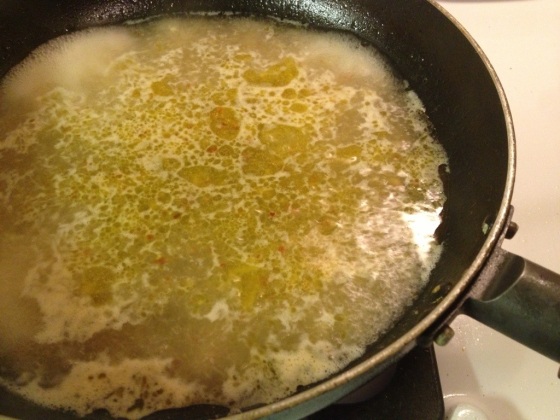
Drain pasta and reserve half a cup of the pasta water. Heat a skillet over high heat. Remove shrimp from marinade, saving the marinade, and add them to the skillet. Cook until pink and caramelized, stirring regularly. Remove shrimp to a plate (try not to pop too many into your mouth) and add the marinade to the skillet. Let cook a few minutes, then add 1 cup of the shrimp stock and 1/2 cup of pasta water. Continue to cook until sauce reduces by half (took about 15 min for me).
20131203-135038.jpg
Add zest and juice of second lemon, butter and salt and pepper to taste. Add in shrimp and pasta and toss to coat. I find it easier to toss them together in the pasta pot.

And there you have it! Lemony, slightly spicy, and full of shrimp–who could ask for anything more? 😉

Love,
Feisty

Easy Recipe of the Week: Trader Joe’s FTW!

Anyone who knows me knows I love Trader Joe’s.  I live for it!  My mom gave me a $25 gift card to Trader Joe’s for Christmas and upon shopping there with it, I cursed her for not giving me more.  Give me $100 in Trader Joe’s merchandise & I will still need more!  Well, maybe not in one trip; their prices are awesome, which is another reason why I love them.

I don’t consider this a “recipe” exactly, but it is a combination of ingredients to make one delectable snack!  Or, your lunch as you rush out the door to catch the 1:10 p.m. showing (yes, I sleep in late on my days off) of Django Unchained (Christoph Waltz, you silver-tongued devil you).  Or, your dinner if you can’t stop thinking how delicious your lunch was yesterday. 🙂

EASY RECIPE/SNACK OF THE WEEK: TRADER JOE’S FTW!

Ingredients

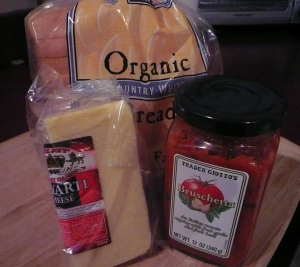
1 jar of Trader Joe’s Bruschetta
1 slice of Trader Joe’s Organic Country White Bread
3 slices from a block of Trader Joe’s Danish Havarti cheese

Now, this awesome snack can be made using any ole brand but I stand by my version using Trader Joe’s.  Experiment with your favorites — the cheese & bread can be replaced with whatever you want!

1. Toast your slice of bread.

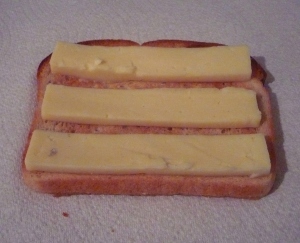
2. While toasting, slice 3 thick pieces from your block of cheese.  I prefer the creamy delight of Havarti, but its up to you.  I would recommend using block cheese only because I love me some cheese.  Also, you could slice more pieces but I feel that might be overkill.  Keep in mind this snack is a respectable 160 calories until you bring in that evil (scrumptious) cheese!

3. Once your bread is nice & toasty brown, pull it out and immediately place your three slices of cheese and press down slightly.  I do this so that the warm bread will start melting the cheese. Mmmmm…
Almost There
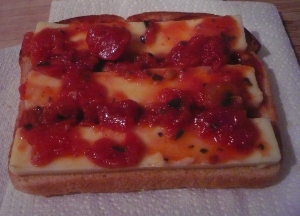
4. Disperse bruschetta on top liberally.  The first time you open your jar it will be room temperature; after that it must be refrigerated, so I like to wait a bit to give the cheese time to get warm.

Finally!

And Voila!  Isn’t it gorgeous?  I promptly scarfed this up after I got my photo.  I thought to add some fresh sliced mushroom on top, which would have made this even yummier in my opinion, but I only have two mushrooms left and the only thing worse than having two mushrooms left is having only one left.

Happy Snacking!
Love,
Feisty

oh baby I wanna get with ya

This is a stuffed mushroom.  With cream cheese. Onion. Garlic. Jalapeno. Homemade bread crumbs.  It’s all easy, it’s all scrumptious, and it’s all at your fingertips!

YUM STUFFED MUSHROOMS

ingredients
8-10 oz. mushrooms
4 oz. goat cheese
1/4 c. bread crumbs
2 cloves garlic, minced
2 T. olive oil
1 T. herbs (chives, basil, oregano, rosemary…)
salt & pepper

Remove stems from mushrooms and chop.  Mix stems with other ingredients except mushrooms and fill each mushroom when well combined.  Arrange on baking sheet and bake until tops are golden, 15 to 20 minutes.

Now, I only had 4 mushrooms.  And I had cream cheese, not goat cheese.  Thankfully they are the same consistency so easy swap there.  I also did not have bread crumbs, but I did have the end piece of a store bought loaf of bread.* 

THIS RECIPE IS VERY FORGIVING.  Get the amount of cheese right, don’t overdo the extra ingredients and you can pile those mushrooms high if there’s too much.  (Note: Too much would definitely be better than too little)

This is what I did:

4 baby portabellas
About a 1/4 c. of cream cheese
About 1 T. of olive oil
2 cloves of garlic, minced (teehee, I love garlic!)
Chopped onion
1 thick slice of jalapeno, chopped
handful of chopped chives
salt & pepper
red pepper flakes
and the bread crumbs…

*Toasted up the end piece until it was nice and crispy, NOT BURNT.  Burnt bread is bitter, and that’s bad! 🙂  Placed it on top of a paper towel and just attacked it, crunching it up until I could get a few big pinches of bread crumbs.  After I filled the mushrooms, I also did another nice sprinkle of bread crumbs and pepper.

I ended up cooking these longer, more like 25 minutes, because the tops weren’t looking brown to me.  I pulled them out when I could start to smell the mushroom cook (a good sign!).  I love that roasted mushroom taste.  With the ingredients I combined, these came out garlic-y with a little bit of spice, absolutely crave-worthy!  Obviously a fun recipe you can experiment with.

Best. Appetizer. EVER.

Image
Happy 4th of July friends!  Even if you aren’t a friend, I guess I can still wish you a happy 4th.  Today is also my brother’s birthday, so happy birthday Devster!  I don’t get to see you nearly enough but I don’t think you really care.

Whenever I depart for a vacation, I like to clean out my fridge of anything that spoils fast — bacon, vegetables, fruit, milk, etc.  Last night, I decided to create a dinner of appetizers, something I have done in the past with mixed results.  Well, NOT TODAY! (or last night…)

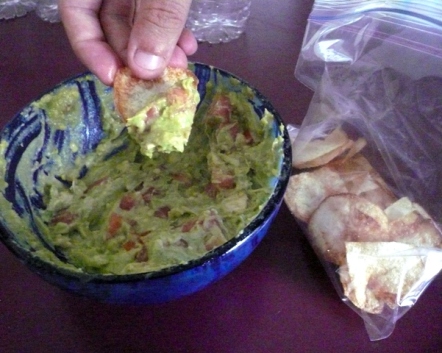
I made bacon wrapped potato bites, which I’ve showed you how to make here, and homemade potato chips with avocado dip.  Did I mention lip smacking, I’m-going-to-kill-you-so-I-can-have-the-rest potato chips with avocado dip???

Before you say “Oh I will just buy chips at the store,” let me stop you right there.  Do you know how impressive it is to people to say “I made this” ?  Besides the fact that you know every ingredient in your food (not just what the bag tells you), people are generally mystified at making the simplest things.  Yes, simple.  The hardest part about making potato chips is slicing the potatoes.  Hint: I am typing this with the shittiest band-aid known to Richmond on my left middle finger (Kroger brand band-aids…never again).

Now, you will need some kind of slicer.  I’m sure a grater with a slicer side would work.  If you have a mandoline slicer, I am officially jealous.  I use a garlic slicer I got for Christmas, a sort of “throwaway” gift my mom gave me (ahem, Santa).  Because of this I have to use smaller potatoes, or cut a potato so that it fits on the little garlic slicer runway.  Whatever you do, don’t just chop them.  I don’t know if they would be able to cook all the way through, and then you don’t really have potato chips.

HOMEMADE POTATO CHIPS
Slice desired amount of potato chips from potato.  I use 1 usually for 2 people.  You get a lot out of it.
Throw slices in a bowl of salt water (water + salt).  Let soak for 30 minutes, maybe?  I do other things and then come back to it later.  I’m not really sure how important this step is but I do it anyway.  Meanwhile, start heating up a pan full of vegetable oil, about half an inch deep.
Drain slices and dry completely.  Once oil is hot (it starts doing a wavy dance), start throwing in potato chips!
We did 12 at a time because they were small, so keep in mind that you want the chips to be able to freely move and not stick to each other. 
Flip them over every once in awhile so they get evenly cooked.  When they start to turn brown, scoop out with any kind of slotted spoon, or you could grab them with tongs.  I use a colander scoop, which works pretty well.  I have not tried using tongs.
Throw them onto a paper towel and blot them, if necessary.  Spread out enough to get an even coating of salt, sprinkling around the chips.

Ryan actually salted them and he did a great job.  I prefer them salty but of course that is less healthy.  Counteract your love of salty chips with this healthy, creamy, scrumptious…damnit, I wish there was more!

AVOCADO DIP
Super simple and super delicious!
2 ripe avocados (buy them at the store when they feel soft, but not squishy)
1 lime
1 medium tomato (I wanted a Roma but Trader Joe’s doesn’t sell them separately so just make sure its firm)
3 cloves of garlic
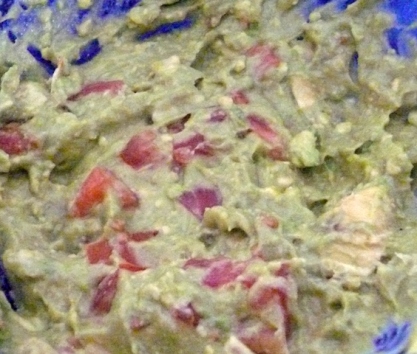
Remove skin and pit from avocados and put in bowl.  Cut lime in half and squeeze one half over avocado, mixing in and mashing until soft and creamy.
Dice tomato in small, bite-size cubes.  Mix into avocado.  Mince or garlic press the garlic into the bowl and mix in.
Finish with juice from other half of lime.

It’s seriously the best, and great for a party or a picnic.  Just tupperware the guac and throw it in the cooler.  Put the potato chips in a plastic bag and keep away from cooler.  You will see — as Ryan said when I told him to stop eating so I could take a photo, “I can’t stop.”

Image

Make Your Own Bread

Image

It may seem daunting, but do it enough times and it becomes something you can bang out after you get home from work, make & eat dinner in the time it takes to rise, & have bread to make sandwiches for lunch the next day.

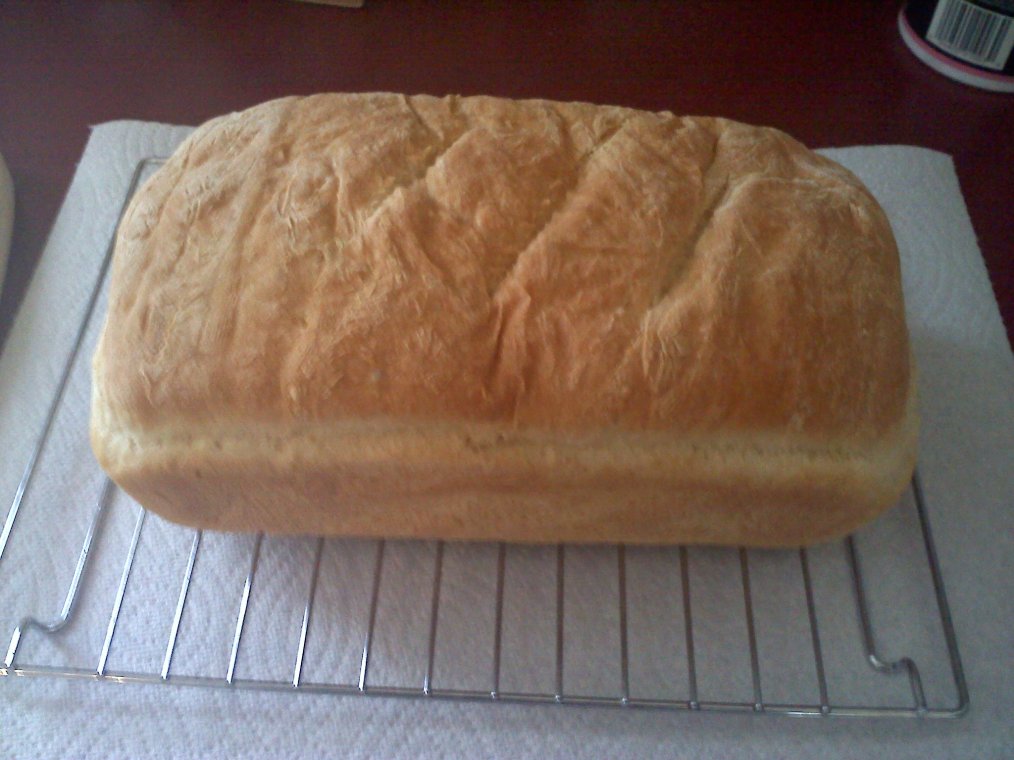
I have tried a few different recipes, but this one is the easiest, quickest, and has the most common ingredients.  It gets the job done, which is soft, white fluffy insides with crunchy delicious crust outsides.

WHITE BREAD
375* for 30 minutes

3/4 c. warm water
2 1/4 tsp. active dry yeast (amount of one packet)
1 T. shortening
1 tsp. salt
1.5 T sugar
1/2 c. milk
2-3 c. flour (I use bread flour, you may use any kind you have)

Add water to large bowl and slowly stir in yeast (I sprinkle it on top, then stir).  Add salt, sugar, shortening (cut into pieces) & milk.  Stir.  Mix in first 2 cups of flour.  Add more flour, 1 heaping T. at a time, until the dough comes together and holds together as you stir it around the bowl.

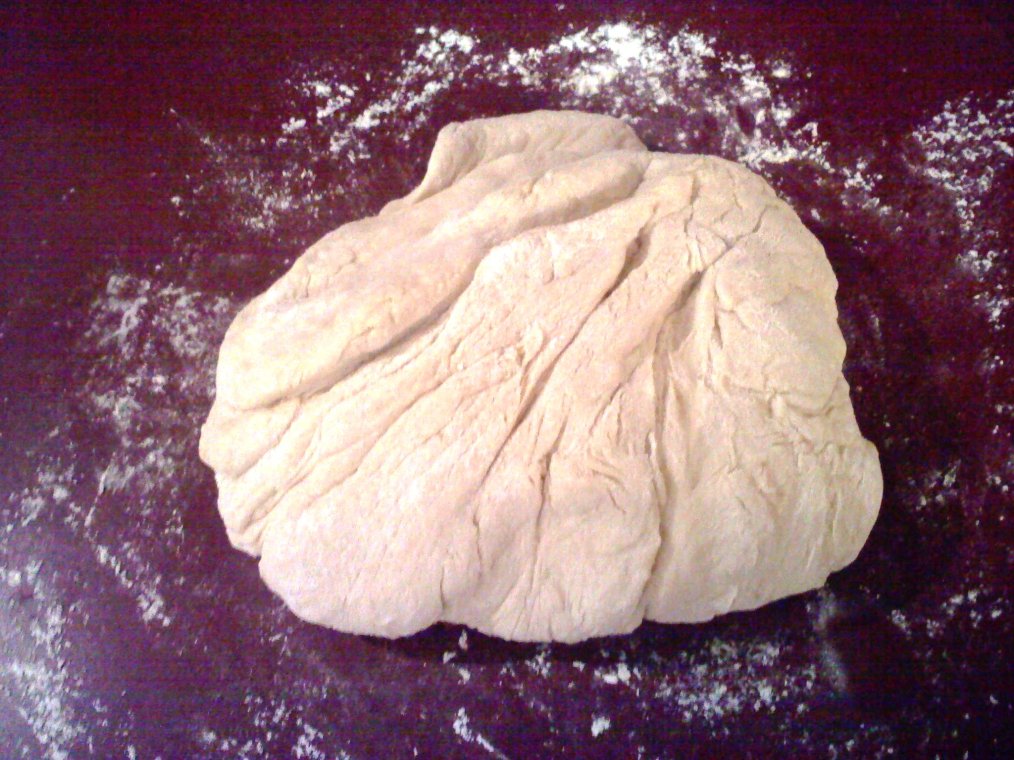
Turn dough onto floured surface and flour your hands, kneading until dough is soft & smooth, not sticky.  Don’t clean up that floured surface, you will need it again later.

Put dough in clean, buttered bowl (Butter can be replaced with oil.  I use the same bowl after cleaning the dried dough out of it, saves on dishes and I only have 2 mixing bowls.  Boyfriend likes to mess them up with popcorn too.), and turn dough over so top is greased.

Cover with plastic wrap.  I just started buttering the inside of the plastic wrap, which will help when your dough has filled the bowl and the entire area of the wrap.  Let rise for 1 hour in a warm spot.  I like to turn the oven on and let it rise on the stove top.  Under a vent would be fine too, provided you don’t like a cold house.

After the hour, punch the dough down with floured fists and again, turn onto floured surface and knead for 8-10 minutes.  Remember to continue to add flour as the dough sucks up whats on your surface.  You will need to continually keep your hands and surface floured so your dough doesn’t stick to everything.

Form dough into a loaf and set into a buttered pan.  Cover and let rise for 30-40 minutes.  Score dough by cutting 3 slashes with a razor at top (looks nice, but I don’t think its really that important).  Put in oven and bake until golden brown.  Bake for full 30 minutes — it will look ready sooner, but its not.  Cool bread on rack or clean dish towel.

Image

poor girl. delicious food.

Part of the real shitty thing about being an artist is that money is not your friend.  recently i have been feeling the pinch rather heavily.  im working a part time job with full time bills, and from now since february, it has caught up with me.  the silver lining is that today my boss said i’m a busy bee & deserve a full time position so he’s “changing my status.”  YIPPEEE!!

until the flow of money increases, i have been doing all i can to avoid going to the grocery store.  every little bit helps, which is why it pays to have already invested in cheap, satisfying foods like rice, pasta, & potatoes.  last night, i made myself a pasta with tomato sauce for lunch today, and it came out so well, i thought i’d share it.  may i present to you…..

CHEAP & Easy Pasta Sauce

    ingredients  (amounts at your discretion)
olive oil
salt & pepper
garlic
tomatoes
red wine
oregano


the oregano & tomatoes were fresh from my garden, & growing your own herbs is really one of the best ways to save money.  herbs add so much to a meal (its true! believe me, i never trusted this either until i started growing them myself), and growing them is so much cheaper than buying cut herbs at the store anytime you need them.

now, start by heating up your olive oil in a small pot with salt & pepper thrown in.  let it warm up on MED heat so it doesn’t burn or overheat.  when its properly warm, throw in your chopped tomatoes.  i used a few bite-sized tomatoes (cut in half), 2 small ones & a slightly bigger one.  let those sizzle amongst the oil, and be sure to stir up eventually so they get covered by the oil and seasoning.

once they start to break down, i mashed them a little bit with my wooden spoon.  don’t overdo it; think of it as prodding them into sauce.


meanwhile, i’m boiling whole wheat spaghetti.  once thats done, drain out MOST OF the water.  keep some of that starchy pasta water to add to your sauce later.  also, if you are done with your pasta but your sauce still needs more time to cook, it will keep your pasta from becoming stuck into the form of the pan its in.


once your sauce starts to look like a sauce, throw in minced garlic.  i only had one clove left but adding more than one would probably be a good idea.  just remember not to do this too early when cooking, or your garlic will burn.

cook it down a bit longer, throw some red wine in if you’re in the mood, and when you can’t wait any longer, toss your pasta & pasta water in to make your masterpiece.


now, i had chopped up my oregano and set it aside to add it much later, as i didn’t want it to get cooked down at all.  i ended up totally forgetting about it until i had put in the tupperware & was about to pack it all up.  oops!  no matter though, because i added it in to the tupperware container and then mixed it around so it would be ruminating with the pasta and sauce.  without cooking it, the flavor stays strong — & why else would you want to add oregano?


enjoy your cheap pasta sauce!!  unfortunately it looks like my tomatoes are done for the year so i’ll probably have to buy more at the grocery store.  o well………..can’t avoid that place forever!

love,
feisty

Create a free website or blog at WordPress.com.